How to make a paper bag
- Share
- Issue Time
- May 10,2018
Summary
Want To DTY a Paper Bag, Let's Do It!
- Reported by Yiwu Tongle Packing Co., Ltd

How to Make a Paper Bag
Want to make a paper bag that's different from the regular brown paper bag? You can always make your own paper bag with some old magazines, newspaper, or craft paper lying around. You can make one that is a little more sturdy or one that is decorative for a gift, an art piece, or as a fun activity.
Part 1. Decorating Your Paper Bag
1
Choose and gather your materials. Depending on what kind of paper bag you want to make, you want to keep in mind what you want it to look like, how sturdy it is, and whether or not you'd like it to have a handle.
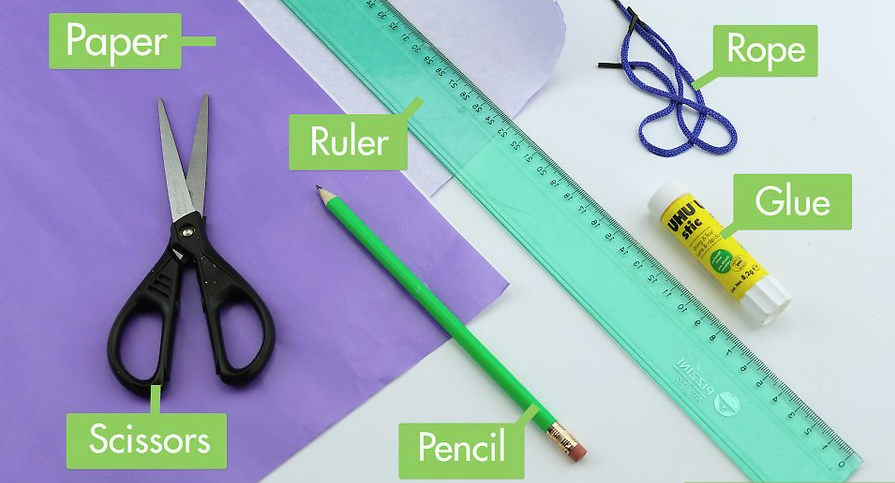
- You'll need scissors, glue, a ruler, and a pencil to help you assemble the bag
- Coloured or patterned craft paper is ideal for this project. It's thicker material helps to keep the bag sturdy and allow it to bear more weight inside. Craft paper comes in all designs and colours.
- Wrapping paper or newspaper is good material to use if you have something more delicate in mind.
- A thin piece of rope or ribbon works to create a handle.
- Gather materials like stencils, feathers, glitter, paint, and colouring pens and crayons to decorate your bag.
2
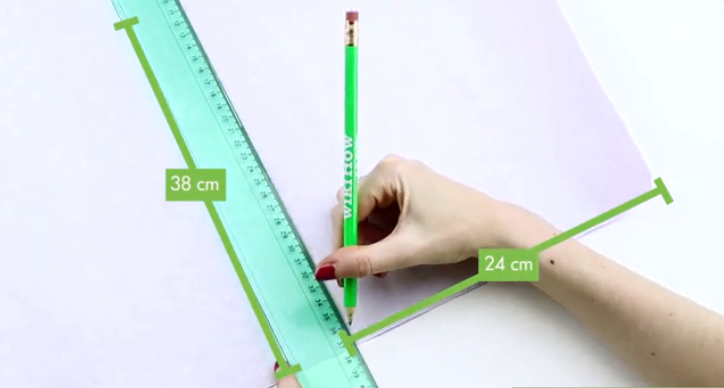
Cut a piece of paper to 9.5 x 15 inches (24 x 38 cm). Use a ruler to measure out the dimensions and a light pencil to stencil out the shape. Or you can cut a rectangle of any size.
- Save yourself some time by using the naturally straight edges of your paper. If your piece of paper is the right size, cut your paper bag from the corner instead of in the middle of your material.
3
Decorate your bag. In some cases, decorating your bag before assembling it is much easier. If you're making a pattern, or painting the bag in a different colour, it's easier to decorate with a flat piece of paper to ensure your pattern and colour remain the same throughout.
- Decorate only one side of the paper. You can decorate both sides if you would like to show off a fun pattern inside the bag or to cover up unsightly materials, especially if you're using newspaper.
Part 2. Assembling Your Paper Bag
1
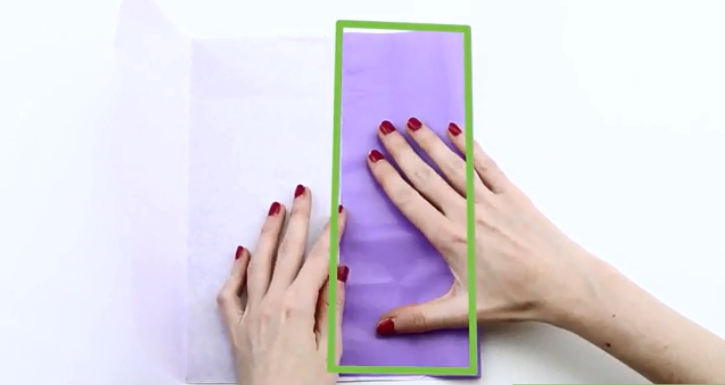
Place the cut out paper in front of you on a flat surface. Make sure to place it in “landscape” orientation or long sides up and down, short sides to the left and right.
- If you have decorated your paper, make sure the decorations are dry and faced down.
2
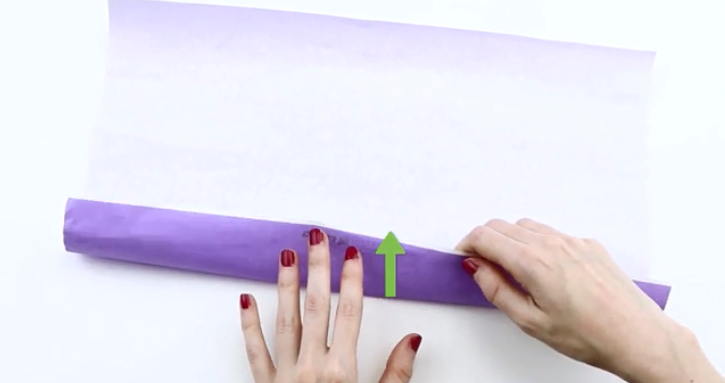
Fold the bottom edge of the paper up 2 inches (5 cm) and sharply crease the fold. When you’re done, unfold. This end will later become the bottom of the bag.
3
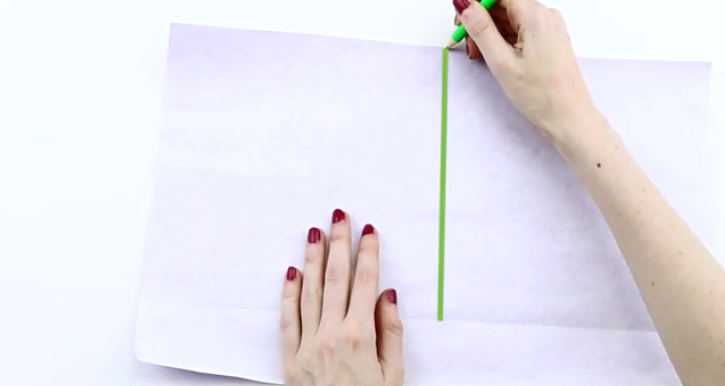
Locate the center points of the top and bottom edges. To do this, you can either calculate the center points with a ruler or fold your paper to find its center. There are three points you will have to mark:
- Maintaining a landscape orientation, bring the short sides together as though you were folding the whole thing in half, and pinch the top and bottom of the would-be fold to mark where the center of each long side is. Lightly mark these spots with a pencil.
- Mark the paper again a half inch (13 mm) to both the left and right of each center point. When you’re done, you should have six marks total: three in the center of one long edge of your paper and three on the other.
4
Fold the sides of the bag into place. Be sure to maintain the landscape orientation as you work to fold the sides as follows:
- Bring the right edge of the paper to the left-most pencil lines and fold. Once the fold is properly creased, unfold. Repeat the inverse on the opposite side.
- Flip the paper over, re-fold the left and right sides downward toward the center, and glue them where they overlap. Be sure to fold along the same lines as before (but note that the folds will be inverted). Let the glue dry completely before moving on to the next step.
5
Flip the bag over so that it sits glued-side-down. Make sure to orient it so that one of the open ends points toward you.
6
Fold the side-creases inward to create a slight accordion effect. You will be make the sides of the bag so that it opens up as a rectangle.
- With your ruler, measure inwards about 1.5 inches (3.8 cm) from the left-hand side of the bag. Lightly mark this with your pencil.
- Push the left side-crease of the bag inwards toward the interior of the bag. Do this until the left-hand mark you made in the previous step sits on the outer edge of where the paper is bending.
- Press-fold the paper downwards so that the pencil mark lines up with the new folded edge. Try to keep the top and bottom edges symmetrical as you press the paper down.
- Repeat on the right-hand side. When you’re done, the body of the bag should fold inwards on either side just like a grocery-shopping bag.
7
Prepare the bottom of the bag. To determine which end is the bottom, look for the crease lines you folded previously that mark the bottom of the bag. Keep the bag flattened for now and prepare the bottom:
- Fold and glue the bottom of the bag into place. Once you've determined where the bottom of your bag is, piece together the bottom:
- Fold the bag 4 inches (10 cm) up from the bottom and crease it along this line.
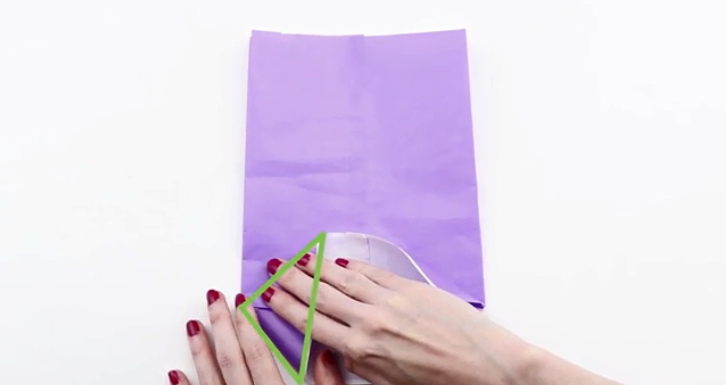
- Keeping the rest of the bag flattened, prop open up the bottom of the bag. The inward-flaring creases should pop open, forming a square edge. Inside, you should see a triangle of folded paper on either side.
8
Piece together the bottom of the bag. You will be folding a few sides to the center, using their triangular shape to ensure the bottom of the bag is evenly put together.
- Fold the left and right sides of the open, square-shaped bottom completely down. Use the outermost edge of each interior triangle as a guide. When you’re done, the bottom area should have 8 sides like an elongated octagon instead of 4 sides like it had before.
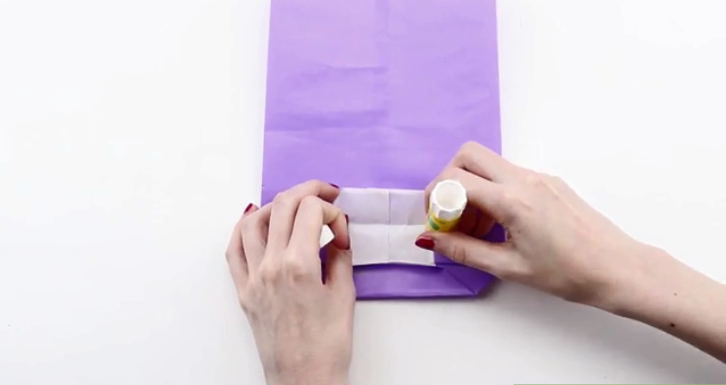
- Fold the bottom strip of the “octagon” upwards towards the center of the bottom of the bag.
- Fold the top strip of the “octagon” downwards towards the center of the bottom of the bag. The bottom should now be neatly folded shut; glue the edges where they overlap and let dry.
9
Pop the bag open. Make sure the bottom is completely closed off and that there are no gaps in the glued edges.
10
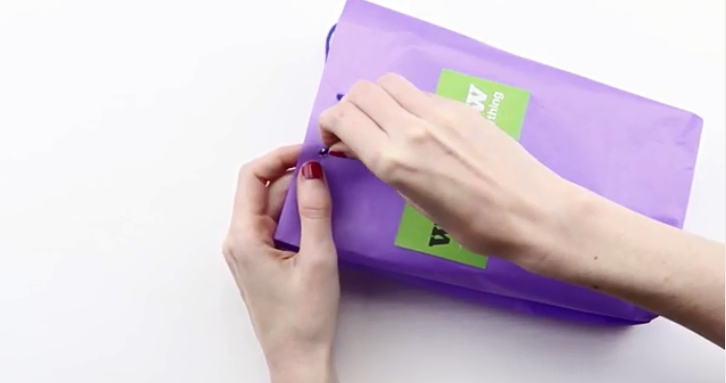
Add your handles. You can ribbon, rope, or string to make the handles or you can leave your bag as is without handles, but handles are harder and take more time.
- Hold the two top of your bag closed and use a hole puncher or pencil to make 2 holes at the top of your bag. Don't punch your holes too close to the edge of the bag or the weight of your bag plus anything inside it could break the handle.
- Reinforce the holes by lining the hole's edges using clear tape or glue.
- Slide the ends of your handle string through the holes and make a knot on your handle string on the inside of the bag. Make sure the knot is big enough so it doesn't slide through the hole. You may have to tie another knot over the existing knot to increase its size. The knot keeps the handle in place.
Reprint: wikiHow